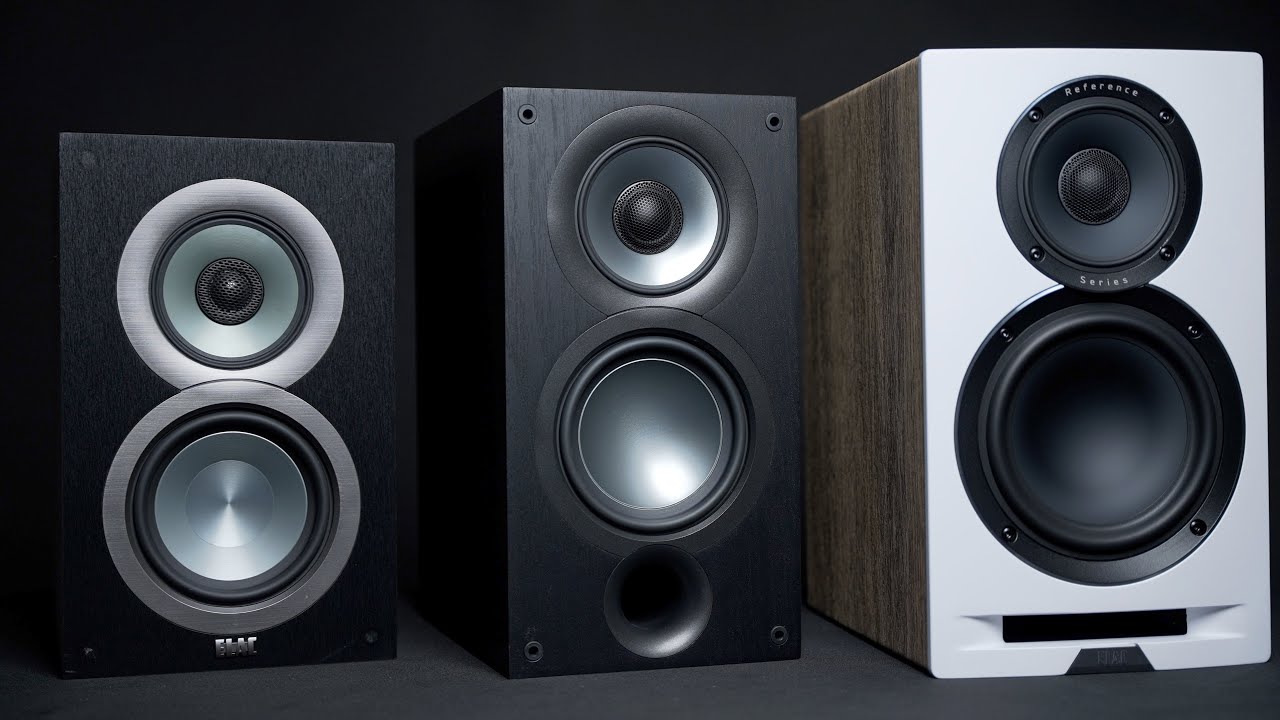
In this video Joe compares the ELAC Uni-Fi Reference UBR62 vs. Uni-Fi 2.0 UB52 vs. Uni-Fi UB5. Watch the video and see who comes out on top!
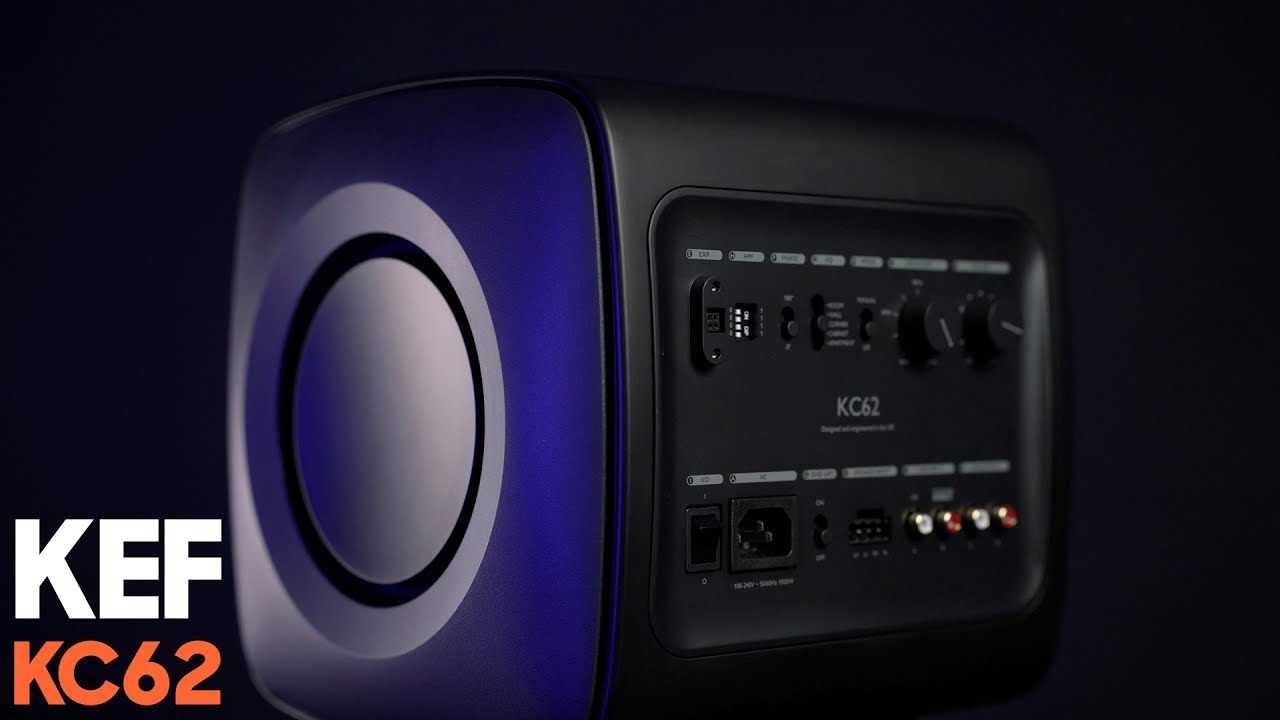
Tiny Subwoofer Shootout | KEF KC62 vs SVS 3000 Micro
The Tiny Subwoofer Shootout featuring the KEF KC62 and the SVS 3000 Micro!
Buy the KEF KC62 on Amazon: https://bit.ly/KEFKC62
SVS 3000 Micro Review: https://youtu.be/s5-XWaqKj5M
Buy the SVS 3000 Micro: https://bit.ly/SVS3000Micro
Disclosure: The Affiliate links above earn me a commission if you purchase using those links. This is at no additional cost to you. KEF sent a review unit to me free for review.
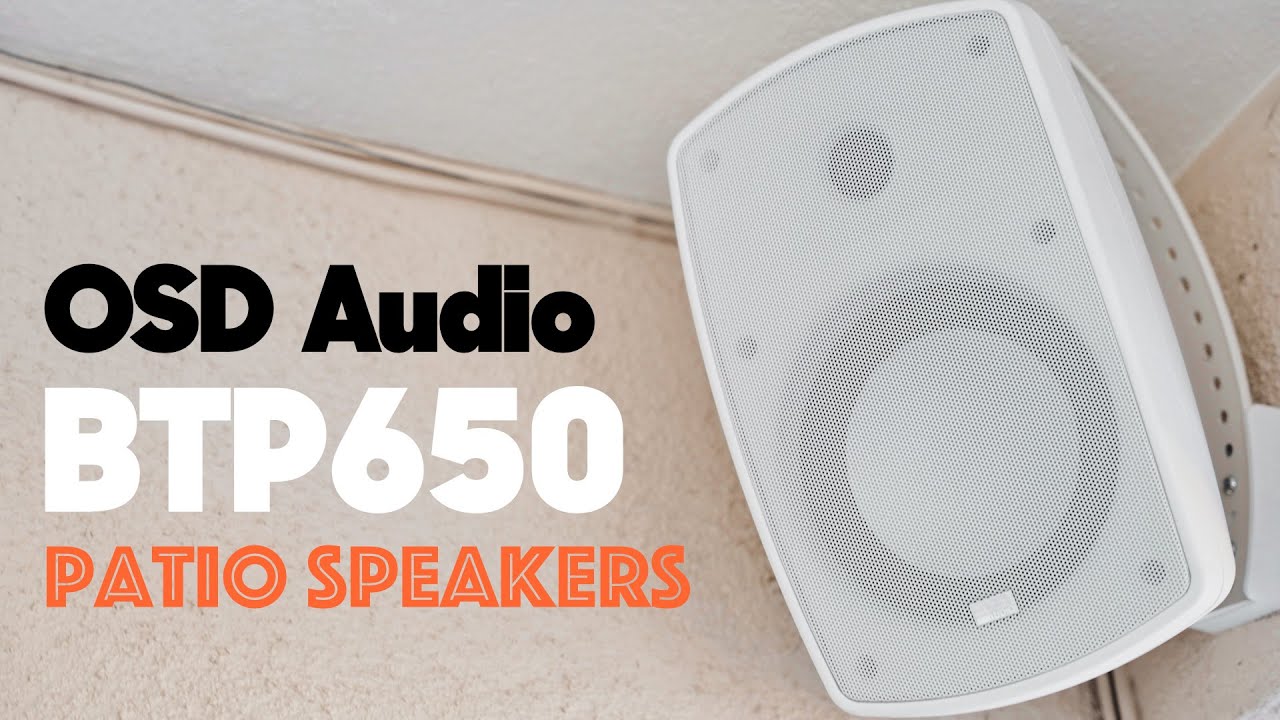
Outdoor Bluetooth Speaker Review – OSD Audio BTP650
Have you ever wanted to add some speakers to your backyard or outdoor area? Check out these speakers from OSD Audio. Buy the OSD Audio …
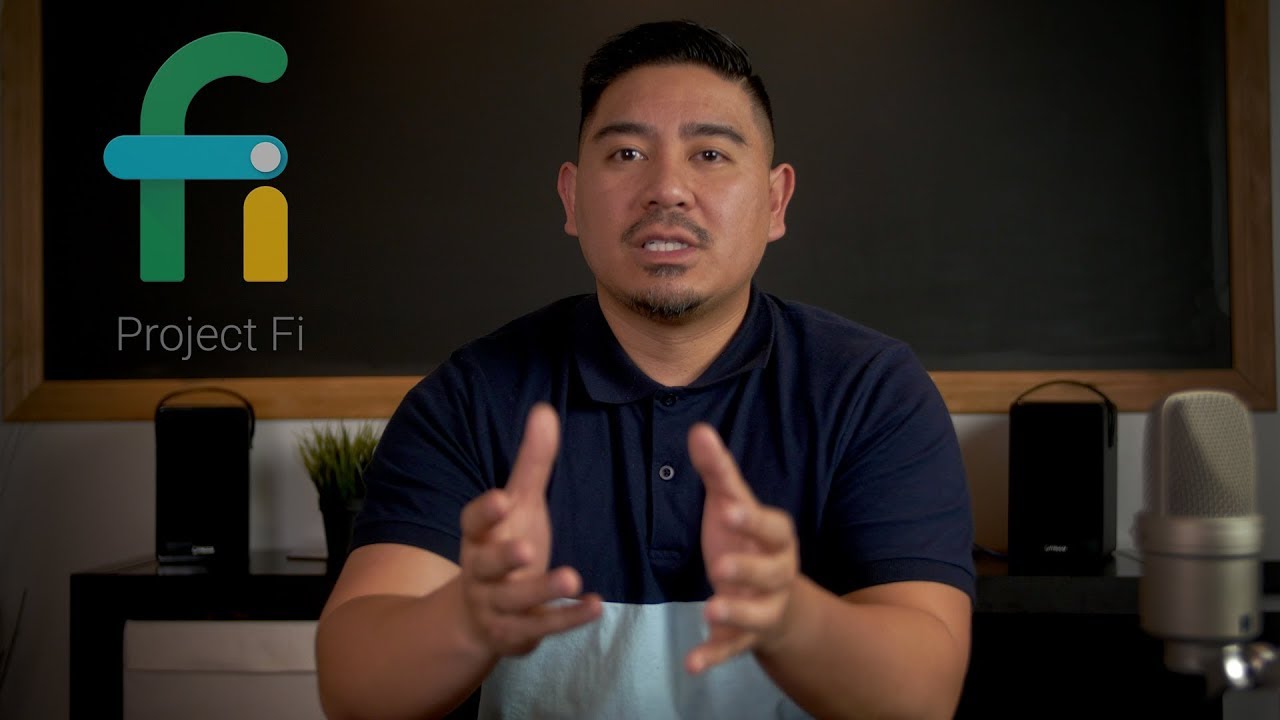
Google Fi Review (Formerly Project Fi)
Update: As of December 2018, Google Fi is available on more phones!
I use a Pixel 2 XL and one of the reasons why I use it is because of Google Fi.
Google Fi (formerly known as Project Fi) is a phone plan that uses the networks from three major carriers, Sprint, T-Mobile, and US Cellular, to provide 4G LTE coverage. I get great signal and coverage.
I think Google Fi is one of the main reasons to consider the Pixel 2 and Pixel 2 XL if you don’t use a lot of data. I have Wi-Fi at my home and place of business so I rarely go over 2GB a month.
If you are a heavy data user and aren’t on Wi-Fi often, then an unlimited plan (like ones offered by T-Mobile) might be better for you.
Pricing
One of the highlights of Google Fi is the low monthly price. Each plan starts at $20 a month for the first user, plus $15 per additional user. That price includes unlimited calling and text messaging. For data, it’s $10 per GB up to 6 GB (for one user). Any data passed that is unlimited but will be throttled after you exceed 15 GB.
Here’s an example of a plan with two people.
- The base price for the first user is $20 plus an additional $15 for the second user.
- They use 4 GB of total data each month at $40.
- Their monthly total is $75 plus taxes and fees.
You can even add on a tablet or extra device with a data-only SIM for the same $10/GB per month.
Extra Benefits
If you travel often, Google Fi works in over 170 different countries and charges the same $10/GB data price and no additional costs for international texting. Pricing for making calls is 20 cents per minute.
Another perk of Google Fi is that I own my phone number. I can easily cancel my Google Fi plan and transfer my existing number to another carrier. There is no contract with Google Fi and you can cancel it at any time without termination fees.
Google Fi is also testing out the use of eSim on their new Pixel 2 phones. An eSIM does not require a physical SIM card (though you can insert one and use it as normal).
I’ve had Google Fi for more than a year and they have great customer support that’s very responsive. You’re able to chat with a representative via the Google Fi app, get a call back (so you don’t have to wait on hold) or communicate via email.
Cons of Google Fi
In order to use Google Fi you need to use a compatible device. This includes Pixel phones (1 and 2), Nexus 5X, Nexus 6P, or Android One Moto X4. UPDATE: They now allow Google Fi on other phones now as of December 2018.
I’ve found that inserting a Google Fi sim card in most phones will allow calls and data to work solely on the T-Mobile network but text messages will not. Also, the Wi-Fi calling handoff will not work.
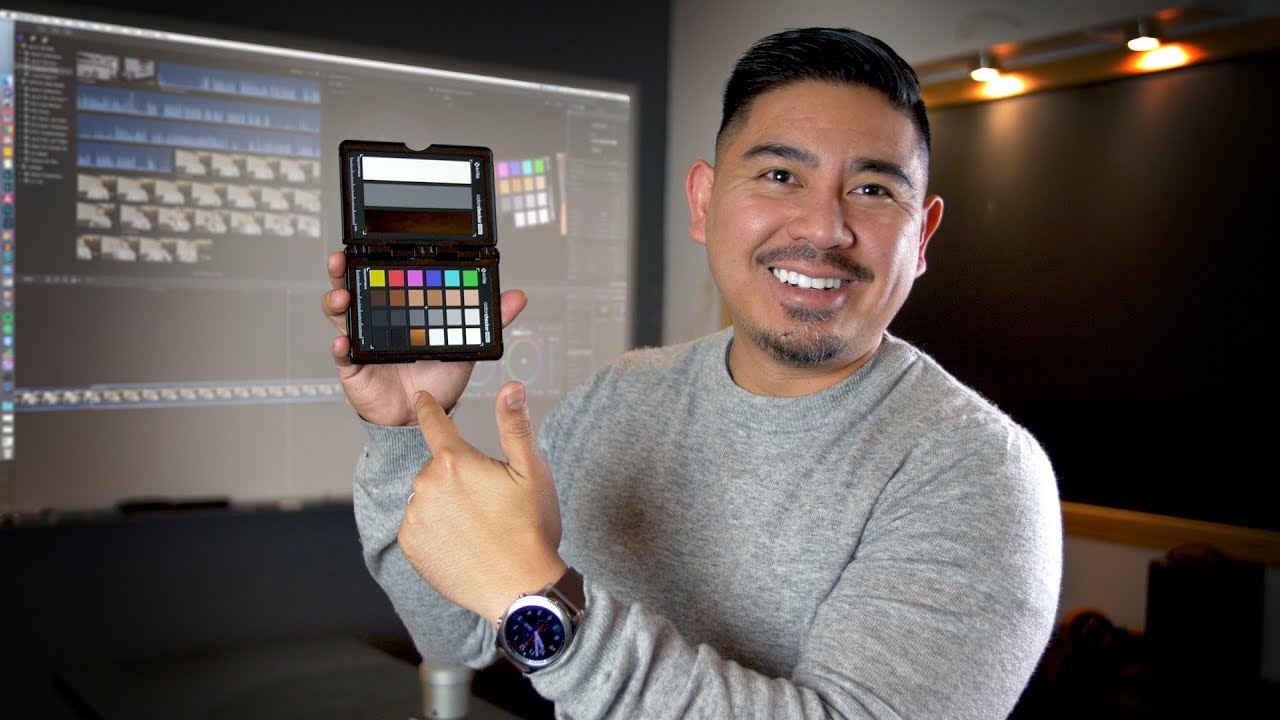
Top 3 Tips for Final Cut Pro X
Here are my top 3 tips for Final Cut Pro X (FCPX)
- Use Neat Video for Noise Reduction.
- Use Color Finale for color correction and color grading.
- Use the ColorChecker Passport Video as a color correction reference.
Recommended LUTs
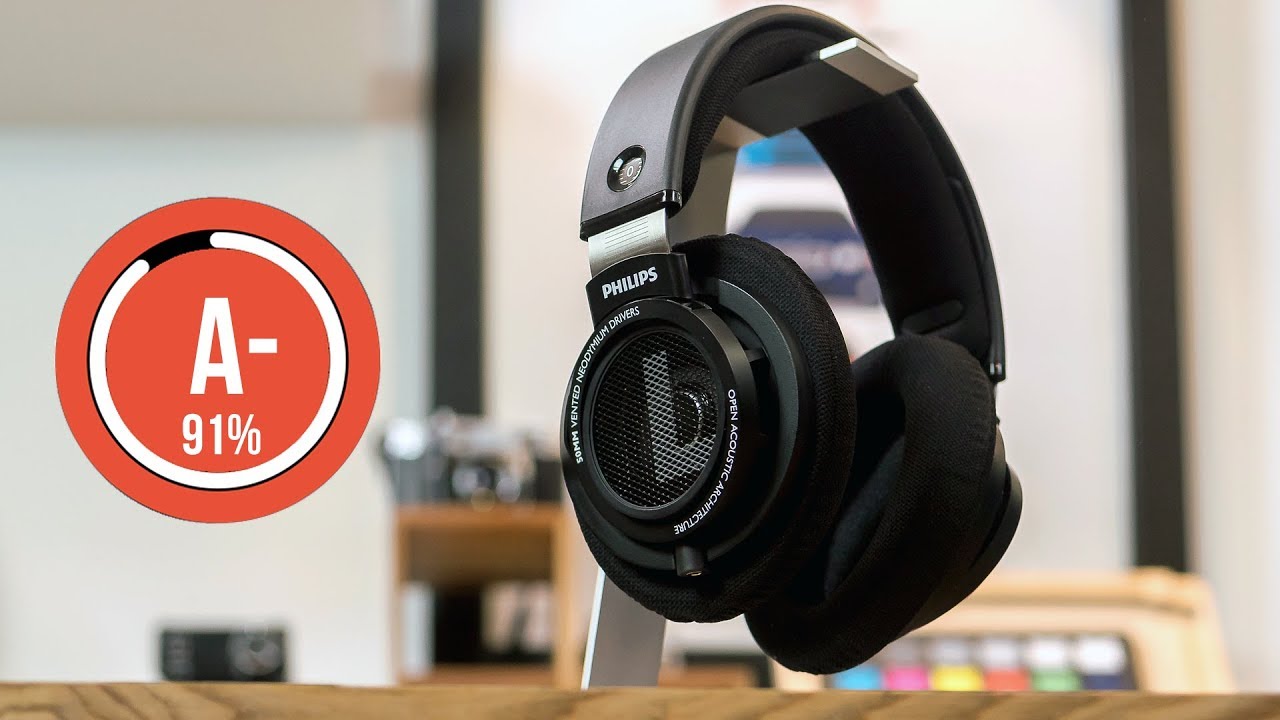
Philips SHP9500S Headphone Review – Gamers and Video Editors Should Love These
This review is on the Philips SHP9500S headphones, not to be confused with the non-S version (SHP9500). This variation only comes with headphones and a cable.
Falling under $100, these Philips SHP9500S headphones are relatively inexpensive considering their quality. I got them on Newegg as an open-box item for $37. The bottom line? These are a great pair of headphones and comparable to anything in the under $100 range.
The most surprising thing about these headphones is how comfortable and light they are. There’s no pressure on the side of your ears. They’re lightweight so there’s no fatigue from wearing them for hours on end.
These don’t have as much bass due to the open-back design. They’re not well suited for heavy bass music fans. If you listen to something with many vocals, it’s very crispy. I tend to reach for these while I edit videos because they’re comfortable and I can hear voices clearly and a lot of other detail.
Great Gaming Headphones
These headphones have a standard headphone jack which sets them up perfectly to be used as a gaming headset. One microphone you can use is the V-MODA BoomPro Microphone for about $30.
I’m not a gamer but I asked a few of my friends who do game and their reactions were pretty similar. They remarked that they could clearly hear the direction and depth sounds were coming from, which is important when you’re gaming.
All in all, these headphones are perfect for anyone that wears them for long periods of time such as video editing, listening to vocal heavy music, watching a movie, or playing games.
Note: This post contains affiliate links. If you use these links to buy something we may earn a commission at no additional cost to you. Thank you.
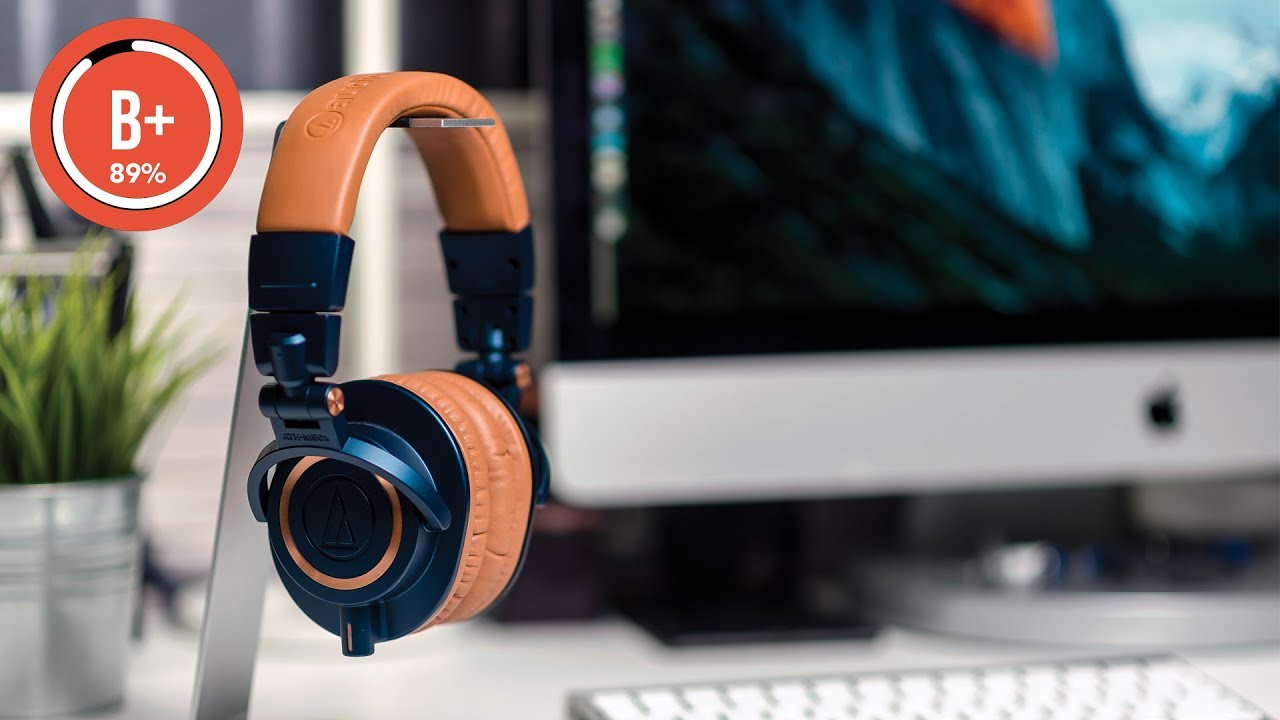
Audio-Technica ATH-M50x Headphone Review
I mainly use headphones for editing video and listening to music. At the time, I hadn’t spent more than $100 on headphones and was just using a pair of Sennheiser HD 202’s. Previously, I’ve had KOSS PortaPro’s and Grado SR80’s and found their sound too be good but both pairs were uncomfortable.
At first, I ordered the Audio-Technica M40x headphones, and ultimately three issues led me to return them and choose the Audio-Technica M50x instead. Firstly, the M40x doesn’t swivel in both directions, only one. Secondly, the M50x were only $50 more in price. Lastly, and most importantly to me, the M50x has larger drivers and better low-end frequency response.
As far as aesthetics go, compared to the M40x, the M50x headphones are heavier and feel like they’re built better. I really like the unique navy blue and tan color options as well.
I noticed an increased bass response with the M50x. These are great for listening to music but I would look elsewhere for something more suited for critical listening.
The M50x headphones come with a pouch and three detachable cables (one coiled and two straight cables in different lengths). I’ve worn them while traveling and there is very little sound leakage from the sealed backs.
Unfortunately, after wearing them for a few hours, my ears began to hurt. Their heavier weight, compared to the M40x’s, made them uncomfortable. I also missed the flatter frequency response that the M40x headphones had. With the larger drivers and increased bass response, I feel like they lost a little bit of the top-end clarity and transparency.
At the end of the day, if I had to do it again, I’m not sure I would choose the Audio-Technica M50x over the M40x.F or a pair of quality headphones within the $100-$150 range, I feel like both the M40x and M50x are great choices. If you prefer the look and increased bass and don’t mind the extra weight, go for the M50x. If you want one of the best value headphones the Audio-Technica M40x might be for you.
Note: This post contains affiliate links. If you use these links to buy something we may earn a commission at no additional cost to you. Thank you.
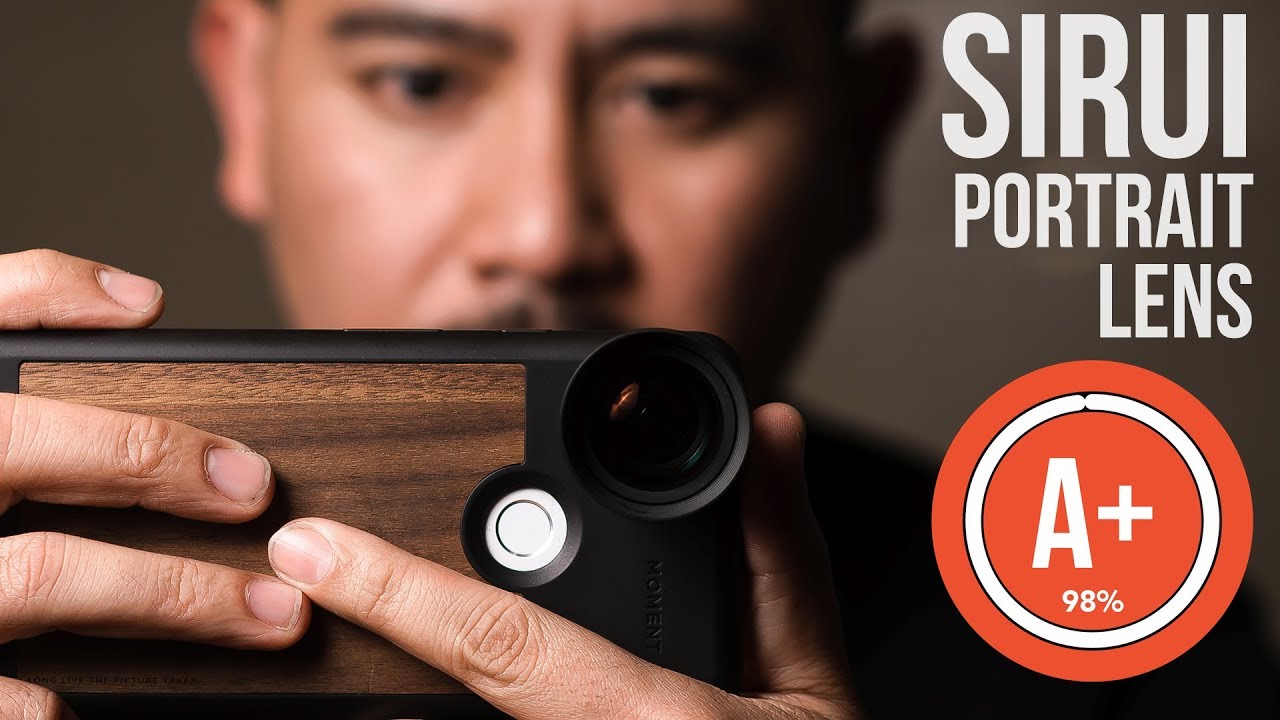
Sirui Portrait Lens vs Moment Tele Lens Review
In a previous post, I did a Wide Angle Moment Lens review and I was really happy with it. I wasn’t as pleased with the performance of the Tele lens. After posting the video review, I got a recommendation from John Harvey to check out the 60mm Sirui Portrait Lens.
I returned the Moment Tele lens and ordered the Sirui lens. I was amazed that it fits the Moment phone Case.
Comparing the Moment Tele Lens and the Sirui Portrait Lens
The Sirui Portrait lens is sharper than the Moment Tele lens, especially in the corners. Vignetting is also much better with the Sirui. The Sirui does not exhibit as much barrel distortion as the Moment Tele lens. Overall, I’m much happier with the image quality of the Sirui Portrait lens.
Details
As far as build quality goes, the Sirui lens feels just as heavy and well-built to the Moment lens. Although the Sirui lens fits on the Moment phone case, Sirui also offers a clip adapter so you can use it on nearly any device without any specific case. The lens comes with a pouch, a lens cap for the front, and one for the back.
For almost half of the price of the Moment Tele lens, the Sirui Portrait lens is a great value and I highly recommend it.
Note: This post contains affiliate links. If you use these links to buy something we may earn a commission at no additional cost to you. Thank you.
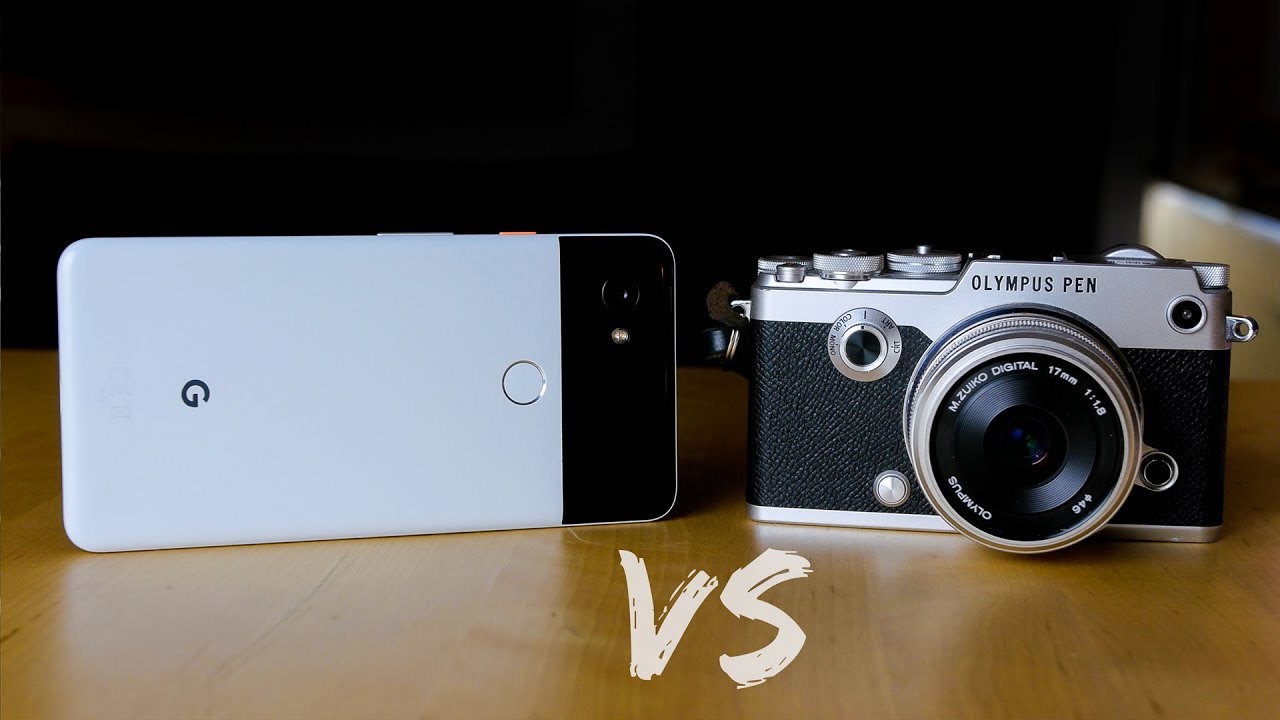
Google Pixel 2 XL Smartphone vs Olympus Pen-F Micro Four Thirds Camera
I’ve seen a few videos comparing the Pixel 2 XL to a $30k Hasselblad camera. To me, that’s a little bit of a ridiculous comparison. Next thing you know, we’re going to be comparing the Pixel 2 to an Arri Alexa or Red.
I have a full frame Nikon D610 for photography and a GH4 and GX8 for 4K video. I use an Olympus Pen-F for daily use as my walk around camera. I’ve recently picked up a Pixel 2 XL smartphone and I’m super impressed with the images coming out of this camera. Do I still need my Micro Four-Thirds Pen-F camera? Let’s take a look and see how the Pixel 2 XL stacks up.
Note: Throughout this comparison, I may refer to the Pixel 2 or Pixel 2 XL. Both use the same sensor and optics.
Sensor Size
I know that this is a crazy comparison, especially when you look at the difference in sensor size. The Pixel 2 XL has 1/2.6″ sensor compared to the 4/3″ (or 1 1/3″) sensor in the Pen-F.
Look at this chart to see the huge discrepancy. The Pen-F’s micro-four-thirds sensor is almost 10x the surface area as the Pixel 2 XL’s. That means it’s able to capture 10x as much light.
Crop Factor
There is a 6X crop factor on the Pixel 2. The Pen-F has a 2X crop factor.
One of my favorite lenses for Micro 4/3rds cameras is the Olympus 17mm F1.8. To get the same field of view and shallow depth of field on the Pixel 2, it would need a lens that is 5.7mm at F0.6. How many affordable F0.6 lenses have you seen? To capture the same amount of light as my 35mm F2 on my full frame camera, you would need a 5.8mm F0.33 lens on the Pixel 2!
That’s a huge difference in light capturing capability. The phone camera just captures less light. It has to compensate by increasing the ISO which increases noise.
Computational Photography
Google has leveled the playing field using computational photography and machine learning aka. A.I.
There’s a trick in photography called image stacking. This is when you combine many images shot at either higher ISO’s to reduce noise. Another trick is to combine a few images taken at different exposures to create an HDR image. Google’s HDR and HDR+ modes apply both processes.
Image stacking and HDR is processor intensive. It’s usually performed in post-processing long after you’ve taken the photo. The Pixel 2 XL is able to perform image stacking and HDR seconds after you take the photo. That’s an amazing feat and a testament to how far technology has come. As you know, HDR stands for High Dynamic Range.
If you compare an image taken in low-light without HDR and a shot with HDR, you will see the huge difference it makes. It increases the dynamic range, reduces noise, and increases detail.
Lens Options
With a dedicated camera, you are able to change lenses. I recently reviewed the Moment lenses for the Pixel 2 XL. They make a macro, fisheye, wide angle and telephoto lens. The Moment lenses go over the original lens. These lenses can change the focal length, but it can’t capture more light.
On my Pen-F, I have a 25mm F0.95 lens that I use for low-light photography. There is no equal on the Pixel 2 XL since the native lens is F1.8 and it can’t go below that.
With an interchangeable lens camera, you have a much wider selection of lenses. You can use wide zoom lenses, prime lenses, tilt-shift lenses. You also have the option for zoom lenses that go far beyond the 2x zoom of Moment’s Tele lens.
Image Quality Breakdown
Low-light and Noise Performance
When it comes to noise performance in low-light, the larger sensor on the Pen-F beats the Pixel 2. The software tricks help make the most of the Pixel 2’s camera, but you can’t argue with physics. A larger sensor has more surface area which can capture more light giving you cleaner images.
Auto Focus Speed
Here is an area where the smaller lens on the Pixel 2 has an advantage. Since the lens elements are much smaller, the motors used to focus can move faster. It uses laser autofocus combined with dual pixel autofocus. When shooting both photos and video, autofocus was fast and accurate. The focusing on the Pen-F is no slouch either, but the Pixel 2 is close to instantaneous. The difference is most notable when shooting video.
Bokeh vs. Faux-keh
Fast lenses are not only useful in low-light situations. They also give that shallow depth-of-field that people associate with a “professional” camera.
Google uses computational photography and machine learning to create a simulated bokeh effect. The Pixel 2 and Pixel 2 XL uses split-pixel technology to create a depth map. When you split the pixel into a left and right pixel, the camera is able to see a stereoscopic image.
Sometimes, the Pixel 2 is able to create some convincing shallow depth of field effects. But when you see the real thing, you can tell there’s a difference. With the Pixel 2, sometimes parts of the image are not blurred when they should be and are when they shouldn’t be.
When a small light is in the background, real bokeh causes those lights to turn into large circles. On the Pixel 2’s portrait mode, lights and reflections do not create large bokeh circles. This is the same with other smartphones with portrait mode as well. I have noticed that the Pixel 2 does attempt to create bokeh circles, but the effect is mild. I hope they make that more aggressive or give us the option to adjust it in the future.
Front Facing Camera (Selfie Camera)
I’ve noticed that portrait mode on the front-facing camera is more consistent than the rear. The “selfie” camera does not have the split pixel technology to create a depth map. It relies only on machine learning to provide the depth of field effect.
I am very impressed by the performance of the front-facing camera. It blows away everything out on the market right now.
Image Rendering
Color Rendering, White Balance and Dynamic Range
Color rendering has a lot to do with white balance. Both do a great job with producing accurate white balance in most situations. In mixed lighting conditions, the Pixel 2 is superior. For example, when shooting indoors, but a light is coming in from outside, the Pen-F has to choose what to white balance for. Either it balances for the temperature of the natural light coming in or for the artificial lighting inside. The Pixel 2 can combine the lighting from both so the color temperature is correct for both.
Color rendering is a subjective choice that manufacturers make. Accurate colors aren’t always the most pleasing to human eyes. What’s pleasing to one person, might not be for another person.
To me, iPhones and Canon cameras have the most pleasing color rendering when it comes to skin tones. Skin tones are important because they are part of the “memory colors.” Most people know the color of grass, sky, and skin. If a camera renders those colors in an odd way, the brain knows it.
The Pixel 2 aims to be more accurate. The Pen-F image is not representative of what my eyes actually see, but the image is pleasing. The Pixel 2 can be unforgiving in its accuracy and bring out more detail than you’re hoping for. Personally, I prefer accurate colors. As long as the information is there, I can always adjust it in Lightroom later.
RAW Editing Latitude
Both cameras can produce raw images, but with the Pixel 2, you have to use a third-party camera app. I am using Lightroom Mobile to capture DNG raw files on my Pixel 2 XL. The problem is that you forgo the use of Google’s HDR+ algorithms. Sometimes, the out of camera HDR JPEG from the stock Google camera is superior to an edited photo without HDR.
One trick that I’ve found is to download the Camera NX app from Charles_l on XDA Forums. It allows you to take HDR photos that save to DNG raw format. Google should add that capability in the future. That would preserve the dynamic range, noise reduction enhancements, and HDR effects. From there, I could tune the image to my liking.
Take a look at these photos I’ve edited using the same presets. The one on the left is the JPEG file, the one on the right is the DNG raw file.
For now, I find that there is much more latitude in the Pen-F raw files. I can push and pull highlights and shadows further without the image breaking apart.
Video
The Pixel 2 can produce some impressive looking video. What it cannot do is create a shallow depth of field when shooting video since portrait mode doesn’t work in video. You will also need a third-party app like Filmic Pro to set your ISO, shutter speed, white balance, etc.
Google has not yet figured out computational videography. Until then, the small sensor on the Pixel 2 acts like a small sensor. For shallow depth of field and low-light, the Pixel 2 cannot compete with the larger Pen-F’s sensor when it comes to video.
The Pixel 2 XL has the upper hand when it comes to resolution though. The Pixel 2 XL can shoot 4K at 30fps. The Pen-F can only shoot 1080p.
Stabilization
The 5-axis in-body stabilization on the Pen-F is one of the best systems right now. The Pixel 2’s uses a combination of (OIS) optical image stabilization and (EIS) electronic image stabilization. It’s downright amazing! Handheld shots look like they are on a tripod. Panning shots look smooth and have less distortion than the Pen-F. With both OIS and EIS enabled on the Pen-F, stuff can start to look odd. Video can have major jello effect to it. Other than using a gimbal, video on the Pixel 2 is some of the smoothest I have ever seen on any camera.
Slow Motion
The Pen-F can shoot up to 60fps at 1920×1080. That will give you 2.5x slow motion. It can also shoot 120fps at a paltry 640×480 resolution.
The Pixel 2 XL can shoot 120fps at 1080p and 240fps at 720p.
Advantages of Using a Dedicated Camera
Shooting Experience
When it comes to ergonomics, a dedicated camera is better. You have access to dedicated buttons and dials to change your settings. There’s also something satisfying about looking through a viewfinder, clicking that shutter button and hearing the shutter snap.
Manual Modes
A dedicated camera gives you more options for shooting long exposure photography, sports or studio portraits. Of course, you can download an app for the Pixel 2 that can do some of those things, but the Pen-F can usually do them better.
Off-Camera Flash
One area of smartphone photography that is lacking is off-camera flash photography. Any strobist can tell you how important controlling the lighting is. As of right now, there is no way to activate off-camera flashes using a smartphone. I’ve seen one by Godox for the iPhone, but the phone itself limits the shutter speed to something like 1/30th of a second. For comparison, I regularly shoot with a sync speed of 1/250 on my Pen-F.
Advantages of Using a Smartphone
Front Facing Camera
Let’s face it, even with the Pen-F’s swivel screen, taking a selfie is awkward. You need a wide angle lens, and this thing gets heavy after a few shots. The Pixel 2’s larger screen and lighter weight make selfies much easier.
Posting to Social Media
With the Pixel, you can snap a photo and post directly to Instagram, Snapchat, or Facebook. With the Pen-F, you would have to transfer the file via wifi to your phone, then post it. That process can add an extra minute or two.
Size and Portability
The Pixel 2 XL fits into my pocket. It’s always with me. If I want to throw it onto a sub $150 gimbal like my Zhiyun Smooth Q, I can shoot some super smooth video. My Moment lenses fit into my jacket pocket.
AR Stickers and Other Cool Features
The Pixel 2 XL has some cool augmented reality features built into the camera. These are fun for posting on social media. Impossible to do on the Pen-F.
Post-Processing
I use Lightroom Mobile to do almost anything I can do on my desktop computer. With other apps, I can add watermarks and graphics to my photos. I’ve even found a way to use my Lightroom presets in Lightroom Mobile. It amazes me every time!
Conclusion
If I were to ignore the fact that the Pixel 2 XL is much more than a camera, it would still be a good camera.
If the Pen-F gets an 85% (B grade) then the Pixel 2 and Pixel 2 XL get an 80% (B-). That 5% difference is tiny considering what you get in portability, ease of use and extra features with the Pixel 2.
Will I Keep My Pen-F?
As I mentioned, I have a full-frame Nikon which I believe deserves a 90%+ (A Grade) for photography. I have a GH4 and GX8 which I would give a 90%+ (A Grade) for video. Now I have a good everyday carry camera in my Pixel 2 XL.
Anyone interested in buying a used Pen-F?
Note: This post contains affiliate links. If you use these links to buy something we may earn a commission at no additional cost to you. Thank you.
Fix the Pixel 2 XL Black Crush Issue
A lot of people complain about the Pixel 2 XL screen quality and for good reason. Out of the box, colors look undersaturated, blacks look crushed, and there’s an off-axis blue shift. This phone costs over $850 and should have a top of the line screen. Samsung makes some of the best OLED displays, but this one uses a screen by LG.
I’ll show you how a two dollar and fifty cent app fixes at least one of those issues.
The Black Crush Issue
The two major issues I had with this screen are the desaturated colors and the black crush. Google resolved the first issue in an update that enabled the “saturated” mode in the settings. Before that update, the only options were natural and boosted. Both had muddy yellows and bland reds.
The second issue is with black crush. There are many levels of brightness between absolute black (when all pixels are off) and the brightest white (when all the pixels are on max brightness.) The problem was that some of the darker shades that were not absolute black, were showing up as absolute black. They call this crushing, or clipping and it leads to too much contrast. You won’t see details in shadows that you should be able to see. You want a natural transition between light and dark.
The Fix
Until Google addresses this issue in a future update, the fix is to use an app called Screen Balance. This app allows you to tweak the color temperature, brightness, and contrast. I found out about this app from the YouTuber, This is Tech Today.
Screen Balance is a free app, but if you want it to start on boot-up and also access more advanced settings, you need to pay for the pro version. As of right now, the pro version of the app is $2.50.
What the App Won’t Fix
The app won’t resolve any blue-shift issues or graininess at low brightness. It will fix the black crush issue. It will also allow you to calibrate the white balance to something more pleasing to your eye.
Why I didn’t Use the Recommended Settings
The recommended settings that I found online said to set the white balance to Fluorescent (warm) and strength to 60%. It did eliminate the black crush, but it turned true blacks into a gray shade.
One benefit of using an OLED screen is that it can display true black by completely turning off the pixels. That means when I’m watching a video where black bars show, the bars blend into the black bezels on the phone.
Those settings also made the white balance too warm for my taste.
My Methodology of Calibration
My Settings for Screen Balance App:
– All settings for Color Mode “RGB” on Pro Version
– Calibrations made with night mode off
– To achieve true black levels, set strength to 4% when adaptive brightness is on, 2% when adaptive brightness is off.
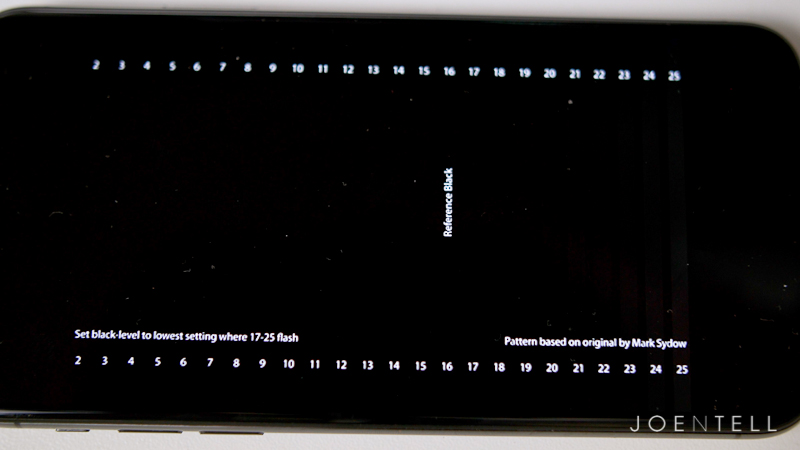
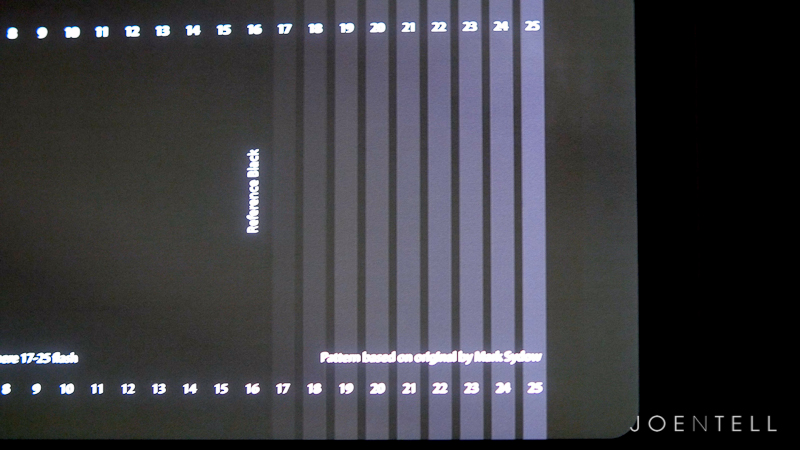
My first goal was to reduce the black clipping as much as possible without affecting true blacks.
I used a video on YouTube from the AVS calibration discs. The first test shows different levels of black and dark gray. You should be able to see all the flashing lines up to the reference black level. If you don’t see some of the lines flashing, that means that you have crushed black levels.

My Settings (Pixel 2 XL Max Saturation & True Black, Adaptive Brightness On)
Red (255)
Blue (255)
Green (255)
Strength (4%)
Contrast (100%)
Brightness (100%)
I found that between 2% and 4% strength were optimal depending on whether I had the adaptive brightness turned on or off. With those settings, I can see all the flashing lines, but at max brightness, the black background still blends into the bezels.
Emulating Different Screens
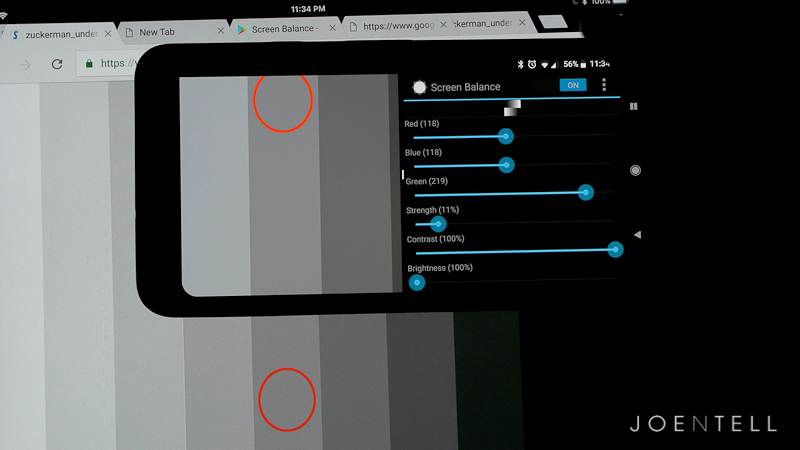 For fun, I wanted to see if I could use this app to emulate some of the screens I had lying around.
Check out the description in my Improve the Pixel 2 XL Screen Quality video for the settings for the iPad Pro and iPhone X
I have a 9.7″ iPad Pro with a Retina IPS display. This is using LCD technology so it cannot display true blacks like an OLED, but Apple’s color calibration has always been excellent.
When using the iPad Pro as my reference screen, I made sure to turn the brightness to max, night shift off, auto-brightness off, and True-Tone off.
I used 18% gray as my white balancing point of reference. 18% gray is also called middle gray and is perceptually halfway between black and white on a lightness scale.
I eyeballed the red, green and blue values, so I’m sure someone else could do a better job if they spent more time or used a calibration spyder. Also, keep in mind that screens can have variations, so what works well on mine, may not be perfect on yours.
Also, note that what the camera sees is different from what my eyes see. In this clip, the grays have a similar color temperature when looking at it in person. On camera, they look way off. It might also have to do with the fact that the Pixel 2 XL screen is OLED and is considerably brighter.
I’ve created one profile that simulates the iPad Pro’s LCD screen, with its lack of true black and all. I also made a profile that achieves true black, but emulates the iPad Pro’s color temperature.
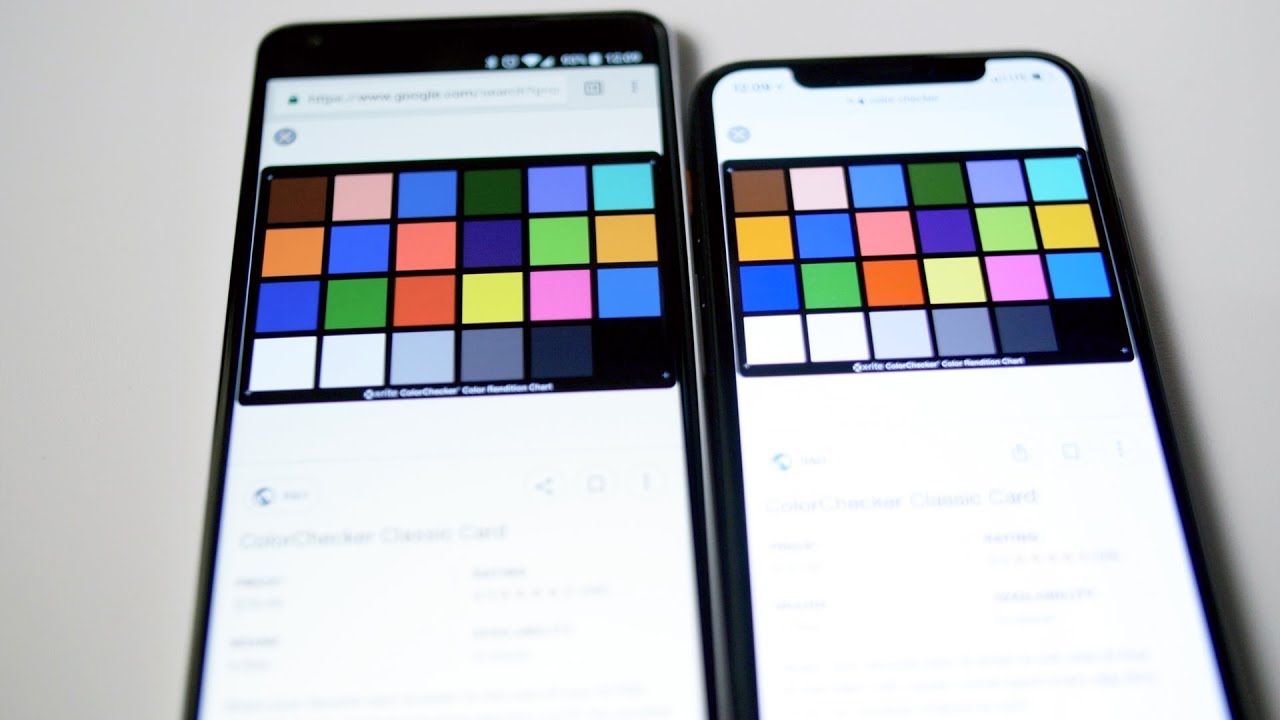
My friend brought his iPhone X, regarded as one of the best screens out right now (yes, it is made by Samsung, but Apple set up the color profile and they did a great job). I prefer their calibration to the oversaturated look of the Samsung phones.
I did my best to match the Pixel 2 XL’s screen to the iPhone X’s and I am happy with how it turned out.

Limitations
There are technical differences between the LG screen and the Samsung screen that causes the differences in the way they render colors. It’s most noticeable in reds and yellows.
There’s only so much that you can do using software tweaks. If the hardware can’t output a certain color at a certain brightness, it just can’t do it.
If you’re willing to root your phone and install a custom kernel, you can use an app called KCal that allows further customization. That’s a big commitment for me though. I want to run my Pixel 2 XL stock for a while. I’m sure I will root and install a custom ROM at some point, but not now.
Conclusion
I’m happy with how my screen on my Pixel 2 XL looks. At no point have I looked at it disappointed by what I see, even when comparing it to my iPad Pro or iMac Retina. It may not be the best screen out there, but it’s still great. We can only hope that Google will come out with a future update with the proper calibration to make the most of this hardware.
Let me know if these tweaks improved your screen. If you have suggestions for other settings, post them in the comments and let us know your method of achieving those settings.
Note: This post contains affiliate links. If you use these links to buy something we may earn a commission at no additional cost to you. Thank you.